
On this page
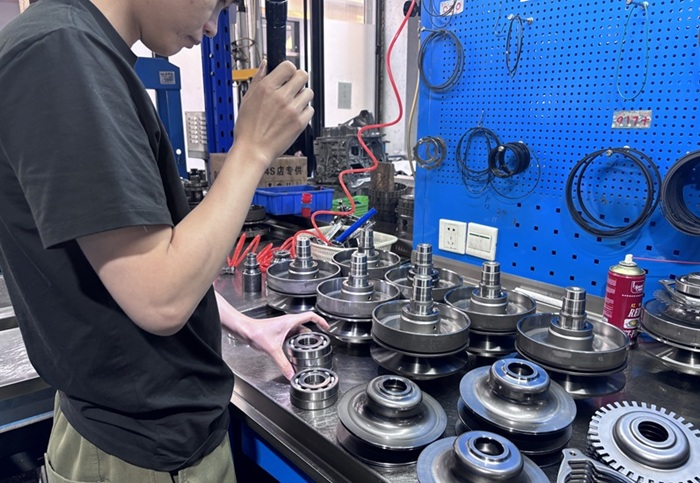
Quick answer. A JF016E check runs in three layers, cheapest first: road test plus scan data (no teardown), then the pan and its magnet (half an hour of work, the highest-evidence step), then the borescope belt inspection Nissan defined in its own service bulletin — borescope J-51951, lens inserted about seven inches between the case and pulley, front-left tire turned one full revolution, both contact faces of the belt. A new belt's links look rounded and full-depth from the factory tumble-deburr process; a remachined belt looks sharp with a wiped-flat flank. And one thing most checks miss: on this transmission the oil pump flow control piston — not the belt — is the part that jams first.
The JF016E punishes guesswork more than most CVTs, because its most expensive symptom — belt slip — has at least three different causes, and two of them are not the belt. This article is the inspection layer of our JF016E cluster: what to read before the pan drops, what the pan tells you, how to run the factory belt check properly, and how to tell a new belt from a cleverly dressed-up remanufactured one. The earlier pieces cover the family itself, the codes it throws and the numbers on the parts; here we assume you have a car on the lift and a decision to make.
01Three layers, in order of cost
| Layer | What you need | Time | What it can prove |
|---|---|---|---|
| 1. Road test + scan data | Scan tool with CVT data (ratio display, fluid temperature) | 20–30 min | Ratio behavior under load, fluid temperature window, whether the fault is thermal or control-side |
| 2. Pan + magnet | Drain plug, pan gasket, magnet condition photos | ~1 hour | Which metal is wearing (belt, bearings, pump), how fast, since when |
| 3. Borescope belt check | Borescope (Nissan spec J-51951) with mirror attachment, isopropyl alcohol, lens swabs | 1–2 hours | Direct visual evidence of belt slip — the evidence level Nissan requires before authorizing a full unit replacement |
The order matters because each layer can save you the next. A clean scan plus a quiet magnet argue against opening the transmission at all; a magnet full of belt-link slivers makes the borescope check a formality rather than a discovery. Skipping straight to layer three — or straight to ordering a valve body — is how shops end up doing the same teardown twice.
02Layer one: what the scan tool should show
The JF016E runs cooler and at lower pressure than the JF011E it replaced, and those two facts define the healthy window you are checking against. JATCO brought working fluid temperature down from roughly 90–110°C on the older unit to 75–90°C on the CVT8 by cutting hydraulic valve count from twelve to eight and lowering operating pressure. So a JF016E cruising with its fluid at 105°C is not “running hot for a CVT” — it is running outside the window this transmission was engineered around, roughly 15 degrees above design, and the fluid shears faster than the schedule assumes.
| Channel | Healthy pattern | What deviation suggests |
|---|---|---|
| Fluid temperature | 75–90°C in normal driving | Sustained readings above ~104°C (highway in hot climates) — viscosity falling toward the clamping-loss zone |
| Ratio display in P or N | Stable reading in the low-ratio band (one owner's healthy unit reads 2.55–2.65 at rest) | A wandering or implausible at-rest ratio points at the control loop, not the belt |
| Ratio under light load | Tracks throttle smoothly through 2.631 to 0.378 | Flare or hold-then-jump patterns match the pressure codes from the fault-code guide |
| Shudder location | None | The family's signature complaint — light-throttle shudder around 25–35 mph (40–56 km/h) — which is a pressure-control symptom until the belt is proven innocent |
One honesty note: there is no published line-pressure specification table for the JF016E in public sources — the pressure targets live in Nissan's paid service data. We will not invent numbers, and neither should you; the temperature window and ratio behavior above are the two channels where public documentation and workshop experience agree.
03Layer two: the pan, the magnet, and what each metal means
The pan drop is the best hour you will spend on this transmission. The magnet tells you which component is dying and the drain plug tells you whether the level was ever right. A well-documented Russian teardown of a Teana L33 at 171,000 km shows the full evidence chain in one case: a large amount of chips on the magnet, periodic jerks under way, and at teardown — a burned torque converter friction lining from improper lockup operation, scuffed cone faces from pressure spikes at lockup, a worn belt working surface, a worn pulley-bearing seat in the housing, and an oil pump with scratches from chips that had circulated into it. The root cause chain the teardown author identified: natural valve body wear, pressure instability, and then everything downstream.
| What the magnet holds | What it means on a JF016E | Where it points next |
|---|---|---|
| Fine black paste (normal film) | Ordinary clutch-friction and normal wear | Continue — but photograph the pattern for the file |
| Grey slivers with a machined sheen | Belt link material — the 28 mm pushbelt's elements are shedding | Borescope check is mandatory; treat pulley faces as suspect until proven clean |
| Chunky steel particles | Bearing or gear hard-parts failure | Housing seat inspection (section 06); pump condition |
| Brass/gold colored material | Converter or clutch bushing wear | Converter teardown before any reassembly |
The debris also has a second, indirect failure path that pan checks routinely under-weigh: chips circulating in the fluid clog the oil pump's pressure-relief valve, and a starved relief valve means the unit cannot hold the clamping pressure the belt needs. The belt then slips for a reason that looks like a belt problem, codes like a belt problem, and — if you skip the pump — comes back like a belt problem.
04Layer three: the factory borescope procedure, step by step
Nissan's service bulletin for the pressure-code complaints (the P0776/P1715 document family, NHTSA reference MC-10199124-0001) contains the only belt check that carries warranty weight, and it is worth following exactly even outside warranty work — because it is built around the two mistakes the check invites: missing part of the belt, and destroying the camera.
| Step | Factory instruction | Why it exists |
|---|---|---|
| 1 | Strap the front-right tire so it cannot rotate | Turning one wheel turns the belt through the differential while the other end stays put |
| 2 | Mark the front-left tire | Guarantees all 360° of belt actually gets inspected — the most commonly skipped guarantee |
| 3 | Clean the borescope lens and mirror with 90% isopropyl alcohol and swab J-51963 | A fogged lens reads as “wear” and causes a false teardown decision |
| 4 | Insert the lens between the CVT case and pulley, about seven inches deep | Positions the optics on the belt face that actually contacts the pulley |
| 5 | Turn the front-left tire one full revolution, forward only | Reverse rotation can wedge the lens between belt and pulley — the bulletin's own caution |
| 6 | Repeat on the second contact face at the second access point | The belt has two working faces; one side clean means nothing about the other |
| 7 | Judge against the bulletin's OK/NG comparison images | Removes the “looks fine to me” judgment call |
Two extras from the same document that reveal how seriously Nissan treats this evidence. If the inspection condemns the belt, the bulletin requires a continuous video of fifteen seconds or less showing the most severe slip evidence together with the VIN label — and states plainly that a missing video causes immediate denial of the replacement request. And the bolt discipline for getting to the valve body is worth memorizing: only bolts with a ‘7’ on the head come out for valve body removal — a deliberate anti-error marking that saves a lot of wrong-fastener grief.
One practical modification that beats the factory method on older, pan-dropped units: a small 1–2 inch mechanics mirror slid under the belt between the pulleys and rotated 90° gives a direct view of the belt flank without a camera, and a borescope with a sideways-viewing tip does the same job more conveniently. The factory lens angle through the case access works on an assembled unit; with the pan down, the direct view is faster and cleaner.
05Reading the belt itself: new, worn, or dressed-up reman
This is the check that protects you when the belt is already in your hand — and it exists because someone, more than once, has sold a remachined used belt as new. The tell is in the manufacturing process, and it is visible to a good borescope photo:
| Belt condition | What the links look like | Why |
|---|---|---|
| Factory new | Edges rounded, teeth full depth, ridges present but soft | The links go through a tumble-deburr operation; everything leaves with a rounded edge |
| Worn in service | Ridges shallow or gone on the pulley-contact flank, general polishing | Normal friction wear — the flank gets wiped toward flat as mileage accumulates |
| Remachined “reman” | Edges sharp, flank wiped flat with no ridges | The flank has been reground; deburr rounding is gone and cannot be faked back |
Workshop documentation of this exact fraud exists: a pushbelt sold as new, traced to an earlier JF011E application, with the sharp reground edges giving it away on the first magnified photo. The implication for the JF016E belt — 901089 factory, 901074 as the high-rated upgrade — is direct: photograph the link edges before installation, and file the photo. It takes thirty seconds and it is the difference between a warranty conversation and a quiet write-off.
While the belt is out, the pulley faces get the same discipline. The failure sequence on this family is almost always ordered: the belt slips first (for pressure or heat reasons), then the slipping belt polishes and scores the cones, and from that point a new belt runs on a damaged track — which is why “just fit a new belt” on a slipped unit is the most expensive economy in this family's repair trade. The cone faces are not a replaceable part in any practical sense; the belt is.
06The pump flow control valve: the part that jams first
Here is the finding that changes most inspection outcomes on low-mileage JF016E units. A teardown of an Altima 2.5 at only 39,000 miles — documented with full video by a Juke-owner rebuild specialist — showed belt slip and damaged pulleys, forward clutches already going at that mileage, and the actual root cause: the oil pump flow control piston had jammed. The belt did not fail on its own; as the teardown author put it, these belts almost never do — they get jammed by a pulley or they slip because the control side let the clamping pressure down.
The reason this failure keeps repeating is that the obvious fix is not a fix. That teardown's owner replaced the pump with another OEM rebuild and watched the same failure return — the pump flow control valve is the family's known weak bore, which is exactly why Sonnax sells an oversized replacement valve for the JF016E's pump flow control bore (part of the 5290 line we covered in the fault-code guide). The improved pattern: new (or remanufactured-to-oversize) pump with the upgraded valve installed, not a like-for-like pump swap.
| Evidence at inspection | Corrective path | What a like-for-like part gets you |
|---|---|---|
| Pump flow control piston jammed / bore worn | Rebuild pump with Sonnax oversized 5290 valve | The same failure, on the same calendar as last time |
| Secondary pulley control bore worn | Sonnax 1715 oversized kit | Pressure codes return as the bore re-wears |
| Valve body assembly beyond bore repair | Complete tested valve body assembly (as we supply) + calibration write | — |
And the valve body itself carries a subtlety that no parts catalog mentions: JATCO, to cut production cost, builds the CVT8 solenoids to a low accuracy class and compensates electronically — each solenoid is calibrated at the factory and the individual calibration data is written into the control unit. That is why a new valve body or new unit arrives with calibration data that must be entered through a dealer-level scan tool, and why a used unit without its calibration simply does not run right. The P17F0 calibration-write step from the fault-code guide is not bureaucracy; it is the compensation layer for hardware that was never precise in the first place.
07The housing seat: the one check that can end the conversation
Between the pump and the belt sits the failure that has no cheap answer: pulley bearing failure wearing the housing seat. The 171,000 km Teana case showed it plainly — the bearing seat in the middle of the housing had worn to the point where the cone had measurable play. A bearing is a part; the housing bore it rides in is the casting. The repair path in that case was machining the seat and fitting a cast-iron sleeve, which is real work with real machine-shop dependencies.
So the inspection sequence at teardown is: pull the pulley assembly, feel and measure the bearing seat before you order anything. A loose cone on a worn seat invalidates every other part decision on the list — the valve body, the belt, the pump all assume a pulley that runs true. This is the point at which a rebuild stops being economic for a customer unit, and it is far better discovered with a dial indicator on the bench than after the crate is assembled.
08The decision table: symptom + evidence → next action
| What you found | What it most likely is | Do this next |
|---|---|---|
| 25–35 mph shudder, no codes, clean magnet | Early pressure-control wear (pump flow or secondary pulley bore) | Live pressure check if you have the data; else plan valve body bore inspection — do not condemn the belt |
| Shudder + grey belt slivers on magnet | Belt has been slipping and the pulleys are suspect | Borescope both faces + pull pulley assembly; expect pulley surface work alongside any belt replacement |
| P17F0 stored, no shudder complaint | Per Nissan's own bulletin: control valve replacement path, not teardown | Follow the TSB decision table; check the calibration-write history first |
| P17F0 on a unit fresh from valve body replacement | Calibration never written | Range-switch QR code → dealer scan tool write — before any parts are ordered |
| Chunky steel on magnet + cone play at pulley | Pulley bearing seat worn in housing | Measure the seat; machine-and-sleeve or retire the case — before ordering small parts |
| New belt in hand, sharp link edges | Remachined belt sold as new | Reject the belt; photograph the evidence |
If the inspection ends at “valve body assembly” or “complete unit”, everything we ship out of this workshop goes to the bench first — pressure-tested as an assembly, because the solenoid calibration story above means an untested valve body is just a casting with ambitions. The JF016E/JF017E valve body page and the JF016E hard-parts page list what is in stock, and the JATCO CVT hub maps the rest of the family.
09Sources and frequently asked questions
Sources: Nissan service bulletin for RE0F10D pressure-code complaints (NHTSA MC-10199124-0001) — borescope procedure, tool numbers, video requirement and bolt marking; JATCO Technical Review No. 22 (JTR22_17, Serena application) for the design temperature and ratio data; GearboxList JF016E specification page; a documented 171,000 km Teana L33 teardown; owner-documented 39,000-mile Altima 2.5 teardown with Sonnax upgrade notes; Transmission Audit's Juke service write-up for symptom mileage bands and the 25–35 mph shudder pattern. Where sources conflict, the conflict is stated; where no public number exists (line-pressure tables), we say so rather than inventing one.
Can I inspect the JF016E belt without a borescope?
Yes, with the pan down. A small 1–2 inch mechanics mirror slid under the belt between the pulleys and rotated 90° gives a direct view of the belt flank, and a borescope with a sideways-viewing tip does the same more conveniently. The factory seven-inch lens insertion is designed for an assembled unit; with the pan dropped, the direct view is faster and cleaner.
What does a healthy JF016E fluid temperature look like?
JATCO engineered the CVT8 to run at roughly 75–90°C, down from 90–110°C on the JF011E. Sustained highway readings above about 104°C put the fluid into the region where viscosity drops and clamping pressure gets inconsistent — the territory where the family's 25–35 mph shudder complaints live.
How do I tell a new belt from a remachined one?
Factory-new links have rounded edges and full-depth teeth from the tumble-deburr process. A remachined belt has sharp edges and a flank wiped flat with no ridges, because it has been reground. This exact fraud — a used belt sold as new — is documented in the trade, so photograph the link edges before installation and keep the photo.
Why did the belt fail at only 39,000 miles?
It probably did not fail on its own. A documented 39,000-mile Altima teardown showed the root cause was a jammed oil pump flow control piston — the belt slipped because clamping pressure let go, not because the belt wore out. On this family the pump flow control valve is the known weak bore, which is why Sonnax makes an oversized valve for it.
Do I need to replace the pulleys if I replace the belt?
Inspect, then decide. The failure sequence is ordered: the belt slips first (pressure or heat), then the slipping belt polishes and scores the cone faces. Once the cones are grooved, a new belt runs on a damaged track and the slip returns. If the faces are clean and the bearing seat is sound, the pulleys stay; if they are scored, no new belt will save the repair.
Why does a new valve body need calibration data written?
Because JATCO builds the CVT8 solenoids to a low accuracy class and compensates electronically — each solenoid is individually calibrated at the factory and its data written into the control unit. A replacement valve body arrives with its own calibration data that must be entered through a dealer-level scan tool. Skipping the write leaves the compensation layer mismatched, and the unit runs wrong even with good parts.
Which bolts hold the valve body on a JF016E?
Nissan marks them: every bolt that needs to come out for valve body removal has a ‘7’ on the head. If a bolt does not carry the mark, it does not come out. It is a deliberate anti-error marking and worth following even outside warranty work.
When is a JF016E not worth rebuilding?
When the pulley bearing seat in the housing is worn — the cone develops play and the housing bore is not a replaceable part in any practical sense. The documented repair is machining the seat and fitting a cast-iron sleeve, which is real machine-shop work. Measure the seat before ordering any other parts; it is the one finding that can end the repair conversation.